TL;DR: I built SysMonitor, a lightweight native macOS app that tracks system resources via the menu bar. I bypassed standard NSPopover constraints to create a custom glassmorphism widget that dynamically throttles its polling to save battery.
I got tired of system monitors that either gave me too little information or swallowed half my screen with aircraft-dashboard-level charts. When you just want to know why your fans are spinning, you don’t need a heavy Electron app hogging the memory it’s supposed to be tracking.
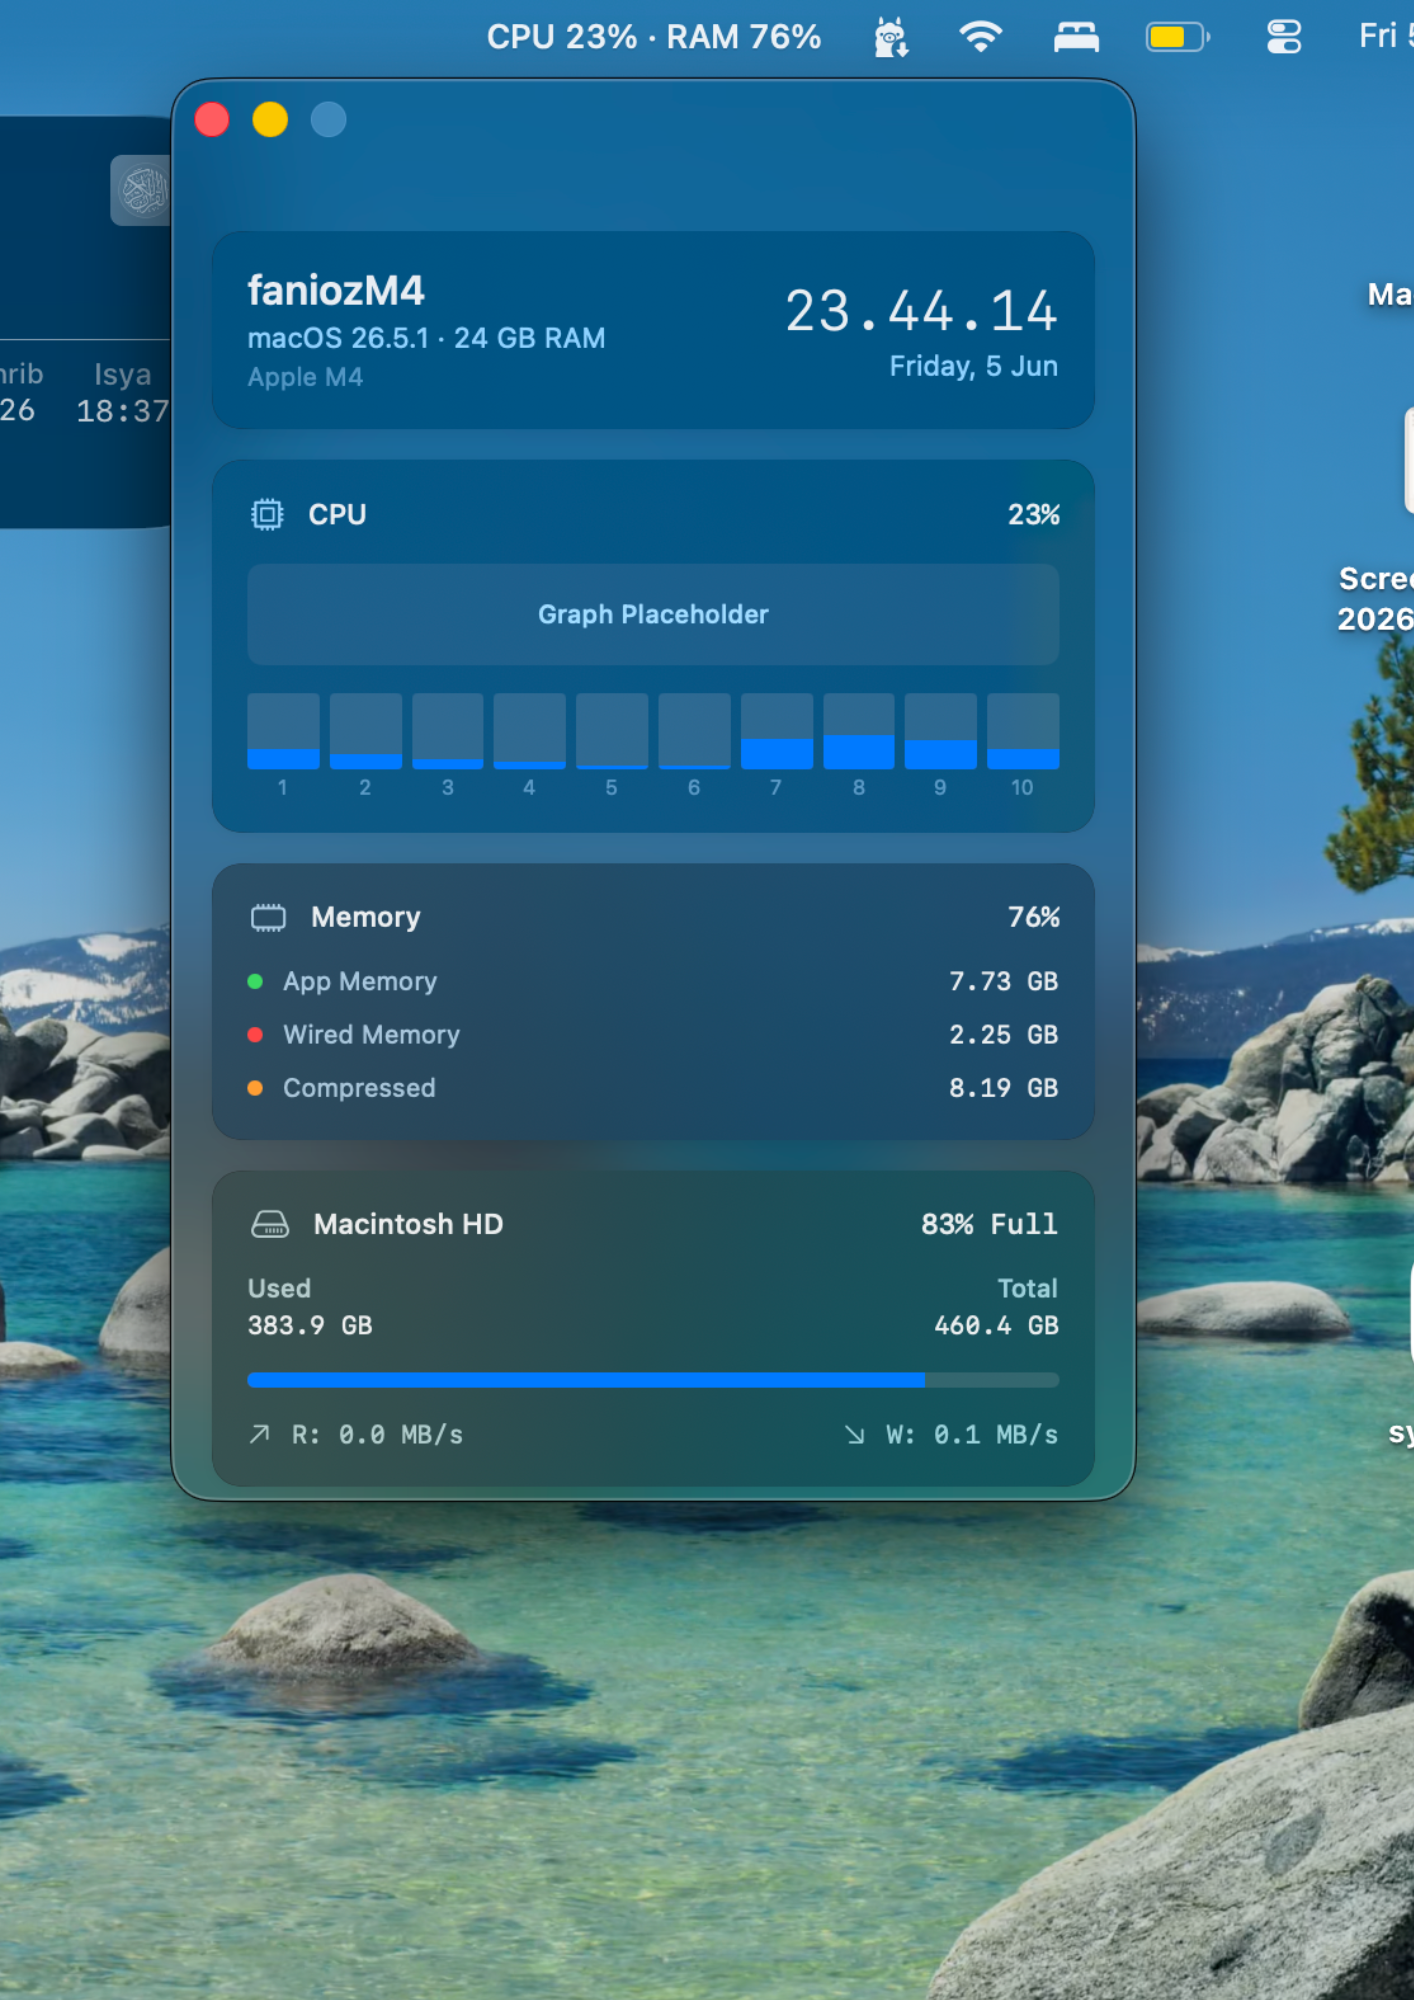
So, I built SysMonitor. It’s a completely native macOS system monitor that lives right in your menu bar. You get a quick glance at your CPU and RAM at all times, and a beautiful, translucent dropdown widget when you need the per-core or disk I/O details.
Here’s how I put it together using pure Swift and SwiftUI.
Architecture: Pure Swift and SwiftUI
To keep the memory footprint as low as possible, the whole app is built natively. I used @NSApplicationDelegateAdaptor to bridge SwiftUI with a classic AppDelegate. The AppDelegate manages the lifecycle of the NSStatusItem (the menu bar icon) and coordinates the polling timers, while SwiftUI handles the complex layout of the widget itself.
Breaking Out of the Popover Box
The easiest way to build a menu bar dropdown in macOS is using NSPopover. You attach it to the NSStatusItem button, and macOS handles the rest.
But I had a specific aesthetic in mind: edge-to-edge glassmorphism. NSPopover wraps your content in a system-defined border and draws a little arrow pointing up to the menu bar. To get around this, I created a custom NSWindow and layered a SwiftUI view over an NSVisualEffectView:
let window = NSWindow(
    contentRect: NSRect(x: 0, y: 0, width: 380, height: 560),
    styleMask: [.titled, .closable, .miniaturizable, .fullSizeContentView],
    backing: .buffered,
    defer: false
)

// Make the window completely transparent
window.titlebarAppearsTransparent = true
window.titleVisibility = .hidden
window.isOpaque = false
window.backgroundColor = .clear

// Add the glassmorphism backdrop
let visualEffect = NSVisualEffectView()
visualEffect.blendingMode = .behindWindow
visualEffect.material = .hudWindow
visualEffect.state = .active
Menu Bar Positioning Math
By ditching NSPopover, I lost automatic positioning. When the user clicks the menu bar icon, my custom window didn’t know where to appear. I had to manually calculate the screen coordinates of the menu bar button and place the window directly beneath it.
Here is the exact math to make that happen reliably across different screen sizes and multi-monitor setups:
if let button = statusItem?.button, let _ = button.window?.screen {
    // Convert button bounds to global screen coordinates
    let buttonFrameInWindow = button.convert(button.bounds, to: nil)
    let buttonFrameInScreen = button.window!.convertToScreen(buttonFrameInWindow)

    let windowWidth = window.frame.width
    let windowHeight = window.frame.height

    // Center the window horizontally under the button
    let xPos = buttonFrameInScreen.midX - (windowWidth / 2)
    // Place it just below the menu bar
    let yPos = buttonFrameInScreen.minY - windowHeight - 5

    window.setFrame(NSRect(x: xPos, y: yPos, width: windowWidth, height: windowHeight), display: true)
}
To make it behave like a popover, I implemented NSWindowDelegate and listened for windowDidResignKey. As soon as the user clicks anywhere else, the window runs a quick fade-out animation and hides itself.
Taming the CPU: Self-Throttling Polling
A macOS system monitor has to constantly run calculations—checking sysctl for memory stats or using host_processor_info for CPU ticks. If you aren’t careful, the monitor itself becomes the reason your CPU is spiking.
To fix this, SysMonitor dynamically shifts gears. When the widget is open and you are actively looking at the real-time charts, it polls every 2 seconds. When the widget hides, it throttles down to every 5 seconds, maintaining enough accuracy for the menu bar text while saving battery life.
extension AppDelegate: NSWindowDelegate {
    func windowWillClose(_ notification: Notification) {
        startPollingTimer() // This method checks `isVisible` and drops the rate to 5s
    }

    func windowDidResignKey(_ notification: Notification) {
        if let window = widgetWindow, window.isVisible {
            hideWidgetWindow() // Fades out and triggers the polling drop
        }
    }
}
Building native Mac apps forces you to interact with some older AppKit APIs, but wrapping them in SwiftUI makes for an incredibly smooth development experience. If you’re tired of electron-based tools draining your battery, you can grab the code for SysMonitor over on GitHub. Try compiling it yourself and tweaking the glassmorphism parameters!